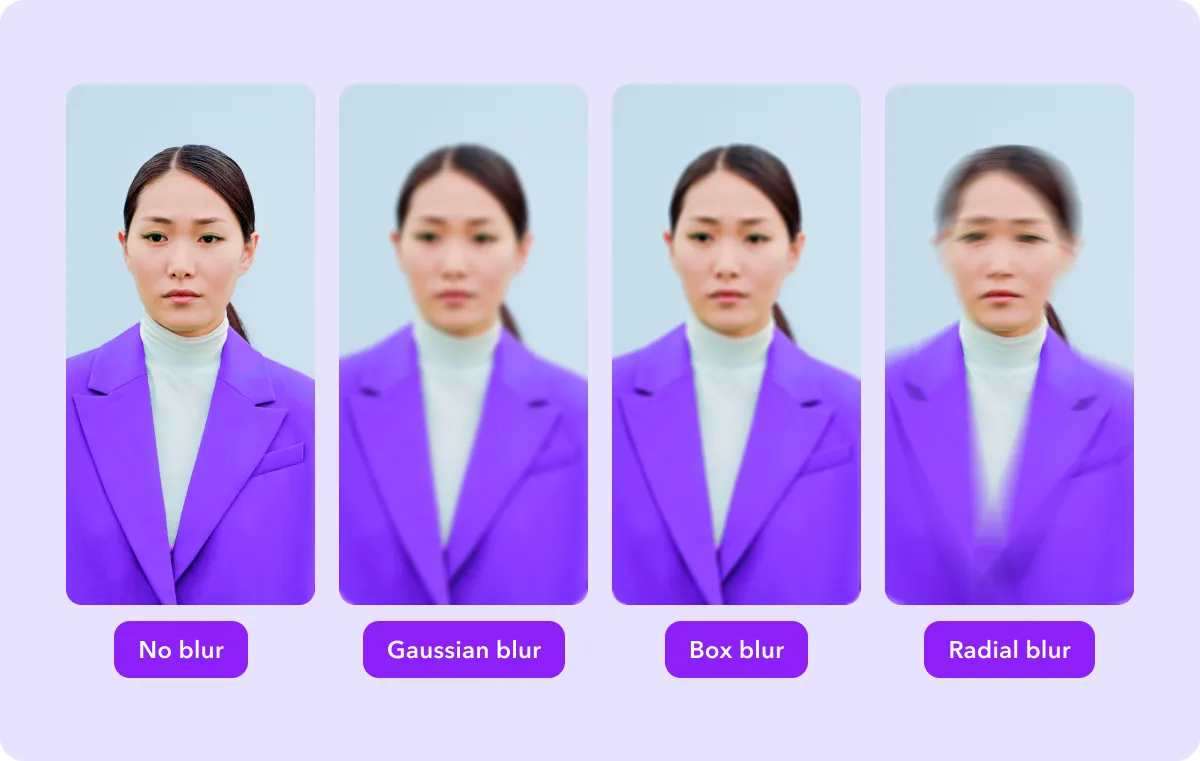
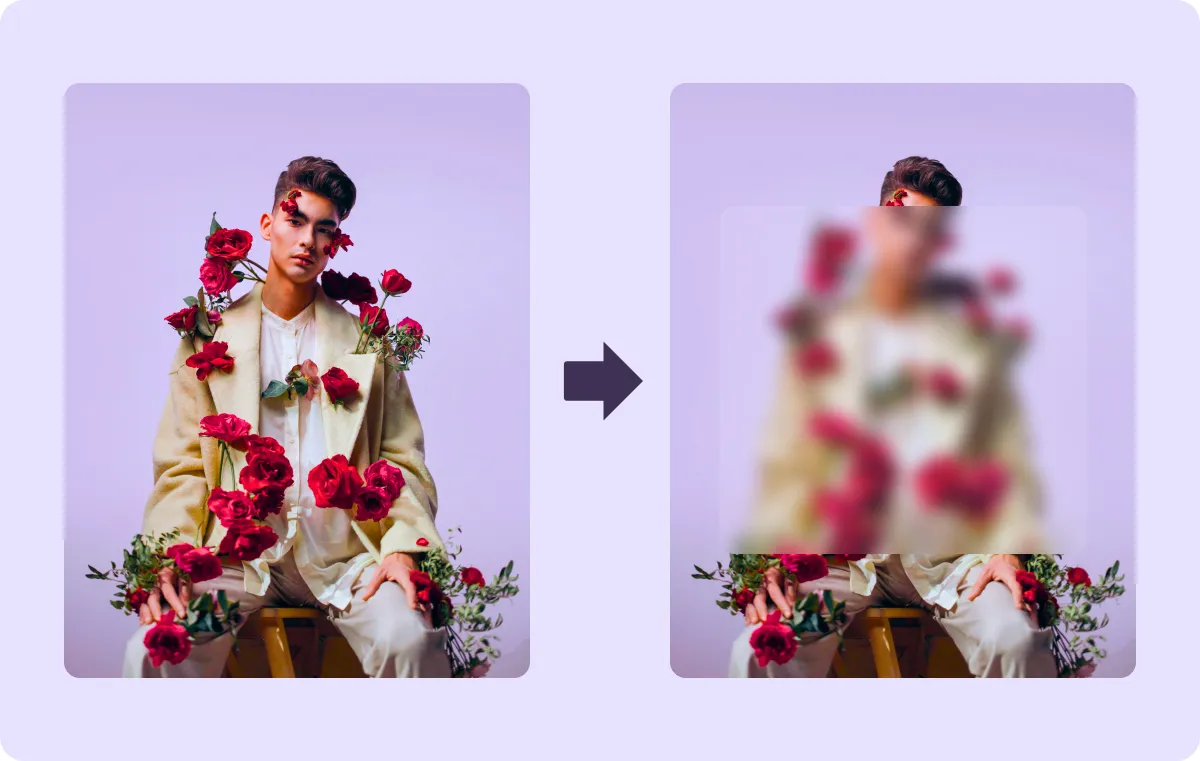
Blurring parts of your video is a simple yet effective way to enhance privacy, reduce distractions, or add an artistic touch to your content. It helps you control what's visible in your videos so people view them exactly how you intend.
Read on to learn about different types of effects and how to blur videos for your needs.
Why You Should Add Blur to Your Videos
Blurring parts of a video is helpful in numerous scenarios, depending on your creative or practical needs:
- Protecting privacy — You can use blur effects to censor sensitive information like addresses, phone numbers, or personal documents that accidentally appear in your shot. This protects confidential details without the need for re-recording.
- Reducing distractions — Blur out elements like objects or people that accidentally appear in the background. Blurring non-essential areas also keeps the focus on your main subject. For example, the TikTok watermark can get in the way of a potentially viral video. Softening these distractions helps your audience focus on what really matters.
- Ensure anonymity — If you're filming in public or featuring people who don't consent to show their faces, you can blur their likeness and other identifiable features to maintain privacy and comply with legal standards.
- Highlighting text or graphics — Applying a subtle blur behind subtitles or text overlays makes the information stand out clearly against the background, improving readability without overwhelming the viewer.
Types of Video Blur Effects
You can choose from several types of blur effects, each with a unique style and purpose. Here are some of the most common options.
Gaussian blur
Gaussian blur is one of the most popular blur effects. It smoothes out the edges of objects by averaging the pixels around them, creating a soft, evenly distributed blur. This effect is ideal for video backgrounds or areas where you want to gently draw focus away from the subject details without making the contrast too dramatic.
It's great for making a speaker stand out in interviews, vlogs, or artistic videos where you want to soften the surroundings without overwhelming other details.
Radial blur
Radial blur mimics the effect of looking through a spinning or zooming lens, distorting the image in a circular or spiral appearance. This effect is ideal for creating dynamic, motion-driven visuals or enhancing a sense of speed. It's common for sports videos, action sequences, and dramatic narratives.

Motion blur
Motion blur replicates the illusion of objects moving quickly through a scene. This effect blurs along the path of motion, giving a realistic sense of speed and direction to dynamic elements, like a car zooming by or a fast pan across a landscape. It's also helpful in animation and action-heavy content where you want to highlight quick movement.
Directional blur
Directional blur applies a linear effect in a specific direction. While motion blur follows an object's natural path, directional blur lets you choose and use the blur at a particular angle, creating a stylized look that emphasizes motion or focus along certain lines. It's ideal for drawing attention to a specific area of the screen.
Channel blur
Channel blur is an advanced effect that lets you blue individual color channels (red, green, blue, called RGB) within media. Color channels are the individual components that make up the colors in a video or image. Think of them like layers: one for red, one for green, and one for blue. Together, these layers mix to create the full range of colors you see.
When you use channel blur, you soften just one of those color layers (like red) instead of the whole image. This allows you to blur photos’ specific colors, creating a stylized effect or blending colors more smoothly without affecting the entire video. Channel blurring is common in music videos and creative projects that require color grading.
Pixel blur
Pixel blur, also known as mosaic blur, creates a blocky effect that obscures details by transforming parts of your video into large, square pixels. It hides sensitive information, making it ideal for masking license plates and faces. Additionally, it can enhance your clips with a creative flair, achieving a digital or glitch-style look for a retro aesthetic.

How To Record a Blurry Video: 4 Options
Here are four techniques to blur videos using your camera or smartphone, no extra app required.
1. Manually adjust the focus
Most cameras and smartphones have autofocus capabilities, but manually adjusting the focus blurs the video. You can create a blurry effect by deliberately setting the focus on an object in the background or foreground (rather than the subject in the center). Tap on an area you want to keep out of focus, and the rest of the frame will blur.
2. Use a dirty or fogged lens
Smudging your camera lens lightly or breathing on it creates an artificial fog that blurs the resulting video. This technique gives a soft, hazy effect that’s great for dreamy or artistic scenes. Just be careful not to damage your lens — cleaning it afterward with a lens solution and microfiber cloth will restore its clarity.
3. Film in low-light conditions
Shooting in low or indirect lighting can cause your camera to struggle with autofocusing. This creates a blurry or grainy effect, especially if the camera has trouble locking onto a subject. Filming in low light works well for mysterious or suspenseful scenes.
4. Move or shake the camera
Moving your camera quickly while filming blurs footage without needing special settings or an additional editing app. For example, panning fast from left to right creates a directional blur, while shaking the camera results in a random motion blur. You can use this technique to create an illusion of speed or disorientation, which is great for fast-paced action shots or video transitions.
How To Blur the Background of a Video With Captions
Using Captions, you can blur the background behind subtitles when editing a style template to make the text pop. Here’s a step-by-step guide:
- Upload your video — Open Captions on your phone. Tap “Create” to import footage from your camera roll, record a new video, or generate talking videos using AI avatars.
- Add captions — Captions will automatically transcribe your video and add subtitles. Tap “Templates” at the bottom of the screen to choose from pre-made templates, or tap “Edit” to customize the text by adding, removing, or correcting words.
- Blur the video background — Tap “Style” to open the video editor for your captions. Then, toggle “Captions background” and choose “Blur” to apply the effect.
- Adjust the blur intensity — Move the slider between 1 and 100 to change the intensity of the filter.
- Review and share — When you’re happy with the results, tap “Export,” choose your preferred format and file settings, and download your video to share on social media.
Edit High-Quality Videos With Captions
With Captions, you can easily apply blur effects to your subtitles without needing advanced editing skills. Whether it's for YouTube, Instagram, or TikTok, AI speeds up the process by automatically adding subtitles, royalty-free music, and dubbing support to your videos.
Find the features you need in Captions and upgrade your content creation.
FAQs
How do I blur moving objects?
Blurring moving objects requires tracking them throughout the video. Most smartphones and cameras have built-in motion-tracking features that follow a subject as it moves. When recording, tap the subject you want to blur, and the camera will lock on to it. Some devices have dedicated action modes with specialized motion tracking.
Alternatively, you can tap on the video background, and the subject will move out of focus and become hazy. If you want to experiment with shutter speeds, you can change your camera’s FPS setting to create artistic content.
Does blurring a video affect the video quality?
Blurring doesn't reduce a video's resolution — you can use it as a filming or editing technique to add creativity to your content. However, over-blurring certain areas can make the video look less sharp. As long as you apply blur effects thoughtfully to backgrounds and subjects, you won't compromise the content quality.
What are the legal considerations for blurring faces in videos?
Blurring faces in videos is often for protecting people’s privacy, especially for shots filmed in public places or that feature people without their consent. Legally, you should add face blur if you don't have permission to use someone's likeness, particularly in commercial or sensitive content. It's also important to know local laws regarding privacy rights, as they can vary by region or country. If you’re unsure, you can consult legal advice.


