


Share
Video is a powerful tool for educators and marketers alike. When it comes to teaching or promoting the use of computers or software, though, holding a camera up to the screen isn’t really an option. The best solution for recording what’s happening on your computer is by using dedicated screen recording software, which captures clips of screen activity that you can edit later. Fortunately, Mac provides built-in options to make this easy.
Keep reading to learn how to screen record on a Mac and how to edit clips into helpful, engaging lessons or promotional material.
Recording Your Mac Screen Using the Screenshot Toolbar
The standard screen recorder for Mac is called Screenshot. You’ll find it in the Utilities folder inside your Mac’s Applications folder if the computer is running MacOS 10.14 Mojave or later.
Here’s a step-by-step breakdown for how to use the tool.
1. Open the Screenshot Toolbar Using a Shortcut
You can search for Screenshot inside your Applications/Utilities folders, but there’s an easier way. Press and hold the keys “Shift + Command + 5” simultaneously, and Screenshot will open. A row of gray icons will appear near the bottom of your screen.
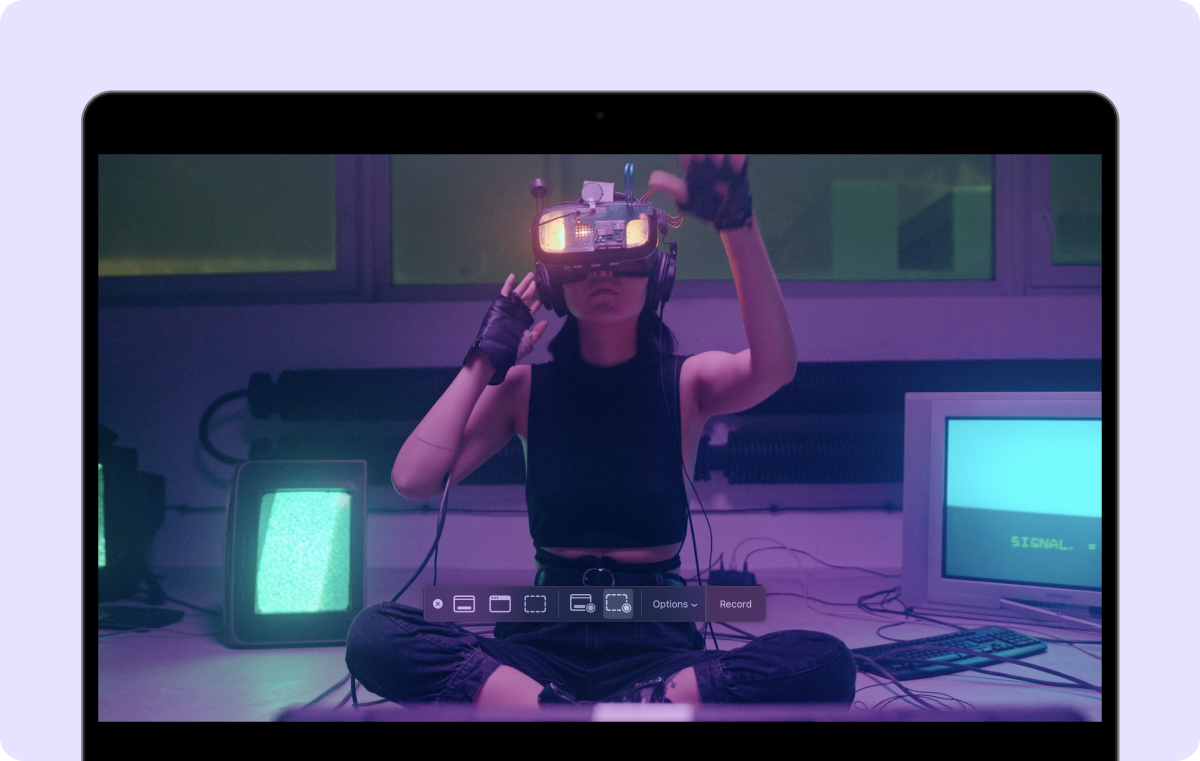
A graphic design of a MacBook showing the screen recording toolbar.
2. Select the Recording Option
The three icons on the left side of this icon strip are for capturing still images of the computer screen. The two on the right are specifically for video, and you can hover over each icon for a pop-up that explains what it does. Click to select one of the two video options:
- Record entire screen — With this icon selected, the actions on the entire screen will be recorded.
Record selected portion — With this icon selected, the screen capture will only record a highlighted portion. You can click and drag anywhere on the screen to highlight a section, and you can resize or reshape the selection using the circular drag handles at the sides and corners.
3. Customize the Recording Settings
Click the on Options (to the right of the icons) to adjust settings in the following categories.
Save To
Set location to save screen recording. Quick options include saving it to your Desktop or Documents folder, sending it with Mail or Messages, or opening the recording in QuickTime. You can also select Other Location to specify any other folder.
Timer
The Timer option will set a 5–10-second delay after clicking the Record button before the actual recording will start.
Microphone
The Microphone setting lets you specify whether to use the Mac’s internal microphone or any attached external microphones for recording audio. Unfortunately, Screenshot doesn’t record internal audio from the Mac.
Options
There are several miscellaneous options here:
- Show floating thumbnail — After the recording, a brief thumbnail of the video will appear in the corner of the screen. Click it for quick access to the recently recorded clip.
- Remember last selection — This option will remember the last selected area of the screen when the Record Selected Portion icon is highlighted.
- Show mouse click — This option will give a visual indicator in the recorded clip showing when and where the mouse is clicked.
4. Record With One Click
When you’re in Record Entire Screen mode and the cursor appearance changes to a camera, click anywhere on the screen to start the recording.
In Record Selected Portion mode, click the Record button to begin.
The only visible indication on screen that a recording is in progress will be a stop button — a circle with a rectangle inside it — shown in the menu bar at the top of the screen.
While the recording is in progress, your computer is fully functional. Perform whatever actions you would like to record on the screen until you’re satisfied. There’s no time limit for screen capture videos, but longer videos can take up a lot of disk space. This means if you have limited space left on your hard drive, you might not be able to record and save longer videos.
5. Stop Recording and Edit the File
To stop the recording, click the Stop button in the menu bar. Alternatively, you can type “Shift + Command + 5” to bring up the Screenshot menu bar, where another stop button will appear.
Once the recording is finished, you can edit the video however you like.
How To Record Audio in Screen Recordings

If you need to record audio along with video using Screenshot, here are five easy steps to follow.
1. Open the Screenshot Toolbar
Find Screenshot in your Utilities folder or type “Shift + Command + 5.”
2. Navigate to the Audio Input Options
Select Options in the Screenshot toolbar and look for the Audio options.
3. Select a Microphone
The built-in microphone is your most basic option to screen record with audio, but consider adding an external microphone if you want higher quality. Screenshot will not record internal audio from the Mac.
4. Record a Test and Adjust Volume
Record an audio test and play it back to make sure you’re happy with the quality and volume. If you need to adjust your input levels and you’re not using any other mixing software or hardware, go to System Settings and look for Sound.
5. Begin Your Recording
Once everything is set up, record the screen capture and your audio.
Note that it’s not necessary to record your audio and screen capture simultaneously — you could also record the audio separately. For example, try using your iphone as a recorder, and then combine the audio and video files during editing.
Edit Screen Recording Videos With Captions
Capturing a screen recording is just the start of creating effective tutorials and how-to videos. To create educational content that engages your audience, you need top-tier editing tools for a professional finish. That’s where Captions comes in.
Captions’ creative studio takes your screen captures and clips and lets you easily combine them with features like the MP4 Editor. To boost accessibility for various learning styles and abilities, use the Auto Subtitle Generator and effortlessly add text to your videos. With Captions, you’ll produce higher-quality videos in less time.
Try Captions today.
FAQ
Can You Screen Record on Mac?
If you’re wondering how to film the computer screen of a Mac, it’s easy with built-in Screenshot software (available for MacOS Mojave and later). For MacOS screen recording on older versions of the operating system, use the built-in QuickTime Player.
Where Are My Screen Recordings Saved on Mac?
You can save screen recordings anywhere on your Mac. Open Screenshot by typing “Shift + Command + 5” and look in the Options pop-up for the Save To list. The files will save to your desktop, documents folder, or any location of your choice.
How Long Can I Record My Screen on Mac?
There’s no limit to the length of your screen recordings. Note, though, that longer recordings can be harder to work with when editing. Also, longer files can be very large, which could be a problem if there’s limited space on your computer’s hard drive.
Does Screen Recording Affect System Performance?
In general, screen recording should have minimal effect on the system performance of modern computers. Note, though, that large files on systems with little remaining memory can cause minor issues. In that case, stick to shorter clips and clear your hard drive if possible.
Can I Edit My Screen Recordings After Saving Them?
Once you’ve created your screen recordings, you can polish clips in standard editing software like Premiere and Final Cut Pro. For the best results and easiest process, use Captions.
By
April 15, 2025
-
6
Min Read
Stay in the loop
Subscribe to our newsletter and get all the news from Captions. No spam, we promise.
Oops! Something went wrong while submitting the form.
Professional videos made easy


