There are millions of talented creators out there on YouTube, and if you’re looking to set yourself apart from the rest, it can feel overwhelming. While having great ideas, scripting, and planning are all crucial for creating quality and entertaining YouTube videos, one great way to make your content stand out is through high-quality editing.
Adding the right cuts, transitions, and tweaks can transform an average video into viral-worthy content. Discover how to edit YouTube videos step by step to tell your story and keep your audiences engaged with polished, eye-catching videos.
How to Edit Videos With YouTube Editor
YouTube has free built-in editing tools that anyone can use to blur videos, create thumbnails, add audio tracks, and more. These features polish your video to keep the viewer's attention throughout your video.
Here’s a straightforward video editing tutorial on how to trim, cut, and add effects to your videos using YouTube’s in-app editor.
1. Sign in to YouTube
Sign in to YouTube Studio, the central hub where YouTube content creators can manage their channel, edit and upload videos, check analytics, and more.
2. Select Content
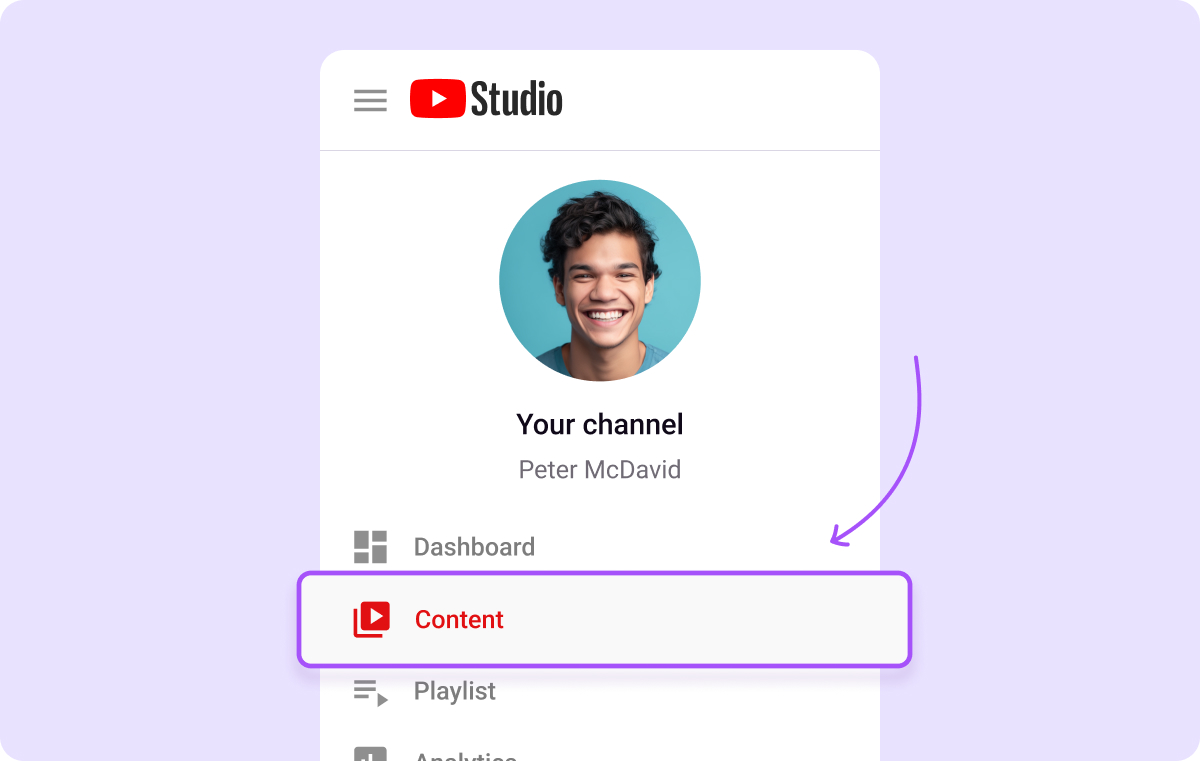
In the desktop version, click “Content” in the menu on the left. If you’re using the YouTube app, click the “Content” tab at the bottom of the screen.

3. Click on the Desired Video to Edit
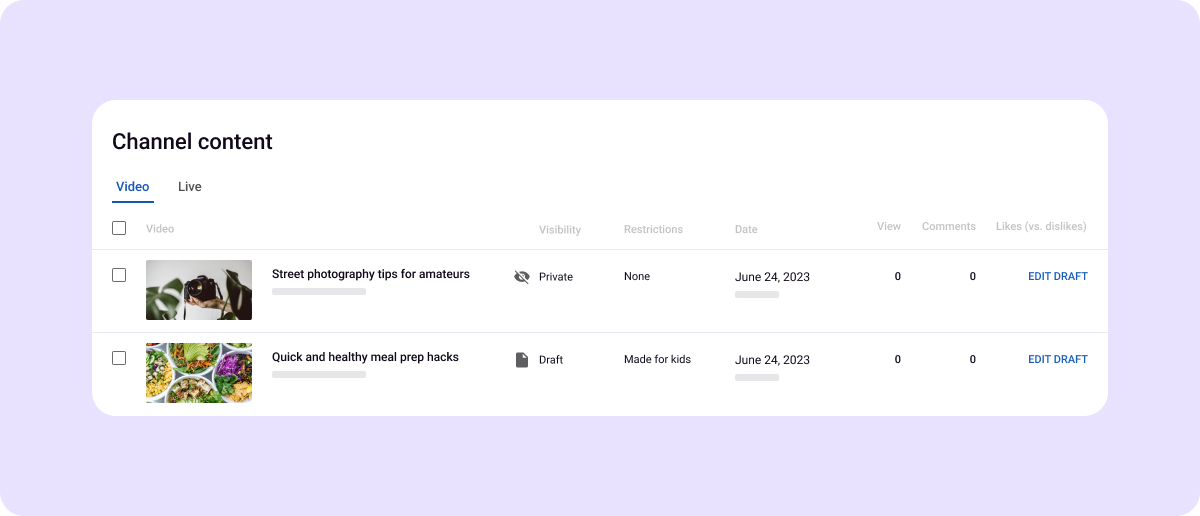
If you’re uploading a new video, click the “Create” button in the top right of your screen and select “Upload videos.” Choose the file you’d like to upload, add your title and description, and click “Next” to add the video to your studio library.
If you want to edit a video you’ve already published, just click on the thumbnail or title of the video.

4. Select Editor From the Sidebar
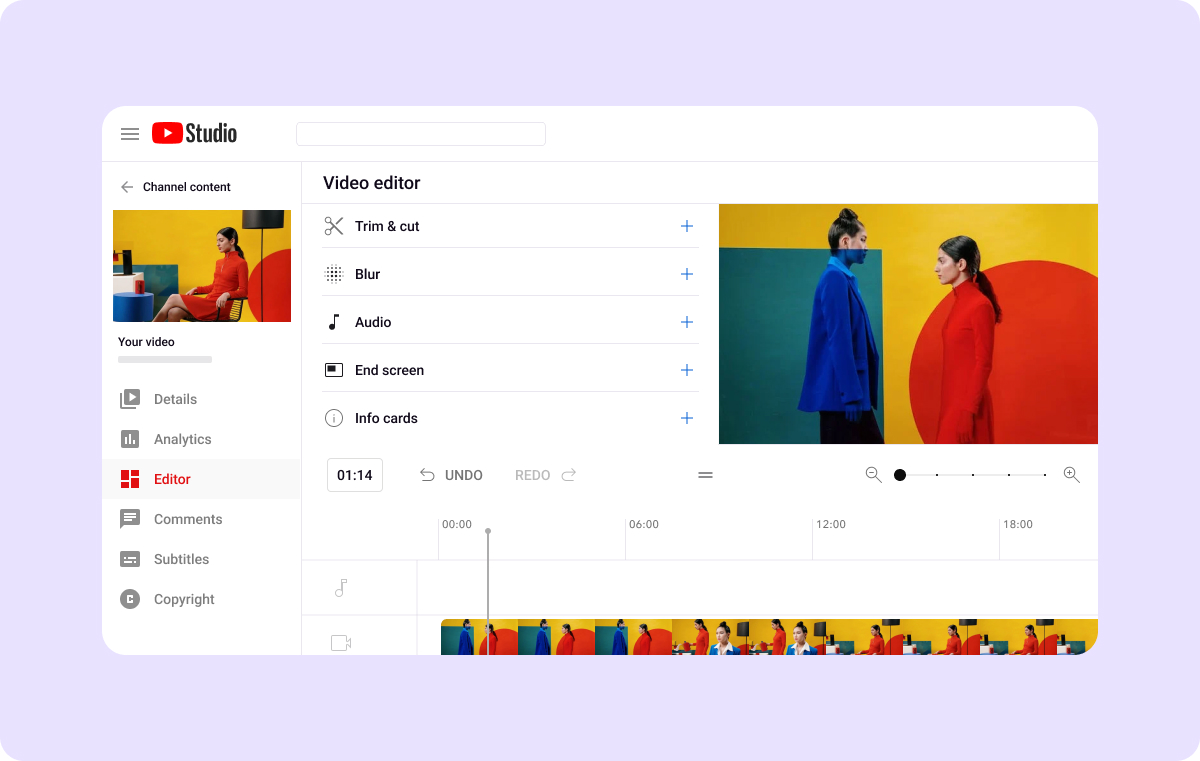
Select “Editor” from the sidebar on the left to begin editing.

5. Trim Your Video
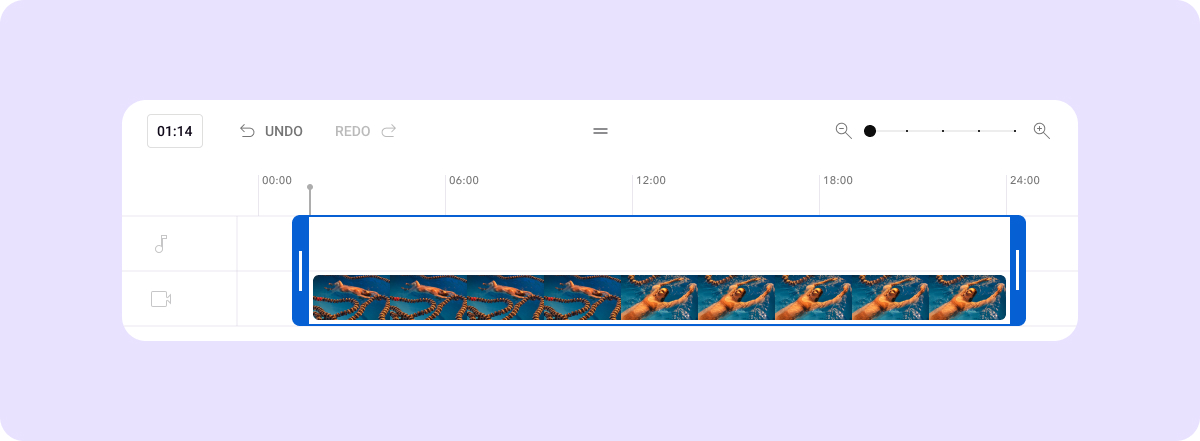
Select “Trim & Cut,” and a blue box will appear around the video in the editor. Slide the sides of the blue box to trim the beginning or end of the video. Once you save your changes, YouTube will remove anything that’s outside the box.

6. Take Out a Section and Cut
To remove a section of video that’s not from the beginning or end, select “Trim & Cut” and then select “New Cut.” A red box will appear. Slide the sides of the red box and stop when it covers the part of the video you want to remove. Click on the checkmark next to “Cut” to confirm your edits. To undo a cut, click “Undo.” Remember, anything outside the red box will remain in the video, so be precise.
7. Add Effects and Audio Tracks
You can also add different effects while you’re on the “Editor” page. For example, to blur videos, click the “Blur Parts of Your Video” button below your video. To add music, click the music notes icon on the bottom left below your video, then click the plus (+) symbol and choose your file.
8. Preview and Save Your YouTube Video
Before you save, click “Preview” to see your edits. If everything looks good to you, click “Save” to finalize your edits. You can also cancel your changes by clicking “Discard Changes.”
Best Practices to Edit Videos on YouTube
Here are a few things to remember when editing YouTube channel videos:
- Include an end screen — Whether you ask people to subscribe or just show your logo, an end screen (the final section of a video) is like adding a final stamp to your video. Customize yours to encourage viewers to take further action, like subscribing to your channel, watching more videos, or visiting your website.
To add an end screen, go to your YouTube studio, select the video from your library, and click the pencil icon to edit the details. When the details page pops up, you’ll see an option toward the bottom right of the screen that says “End Screen.” You can then choose a template for your end screen and customize your elements.
- Use a mic and eliminate background noise — A good external mic can give you clearer audio, whether you’re recording on a smartphone or camera. That said, these come at a cost, and the best mics can be expensive.
If you can’t use a mic and have trouble with background noise, you can use an external AI tool like Captions to remove ambient noise and echoes. That way, you can still achieve that studio-quality sound and help viewers focus on your message.
- Enhance your videos with B-roll — Smoothly connect scenes or set the stage by adding extra footage, also known as B-roll. This added visual content can make your videos smoother and more engaging. Use B-roll to cover edits or cuts in your footage to maintain a cohesive flow that keeps viewers visually stimulated and engaged.
- Add Catchy Thumbnails — Thumbnails are the first thing viewers see, so you want to make them attention-grabbing. Make sure your image is sharp and lively. You also need to quickly show viewers what your video is about as they scroll over it. For example, use a picture of yourself in the gym for a workout video or a photo of the meal you’ll be cooking for a recipe tutorial. Eye-catching thumbnails can help pique curiosity and interest, increasing the chances that people will click on your video.
How to Edit YouTube Videos With Captions
Still trying to decide where to edit YouTube videos quickly and efficiently? YouTube’s in-app editor has limited capabilities, so if you want your content to compete against other studio-quality videos, opt for a comprehensive solution like Captions.
This all-in-one creative studio gives you more ways to edit and customize your content, and its AI-powered editing features can help you save time along the way.
Learn how to edit YouTube videos with Captions for your next project.
1. Trim Excess Noise and Remove Distractions
Captions can automatically remove background noise and enhance speech for better communication. Use AI Trim to automatically trim your videos’ filler words, mistakes, and speech pauses. Eliminating these distractions lets listeners focus on the content, connect with your message, and hopefully hit the like and subscribe buttons.
2. Add Captions and Subtitles
Add captions and subtitles to your YouTube videos to make your content accessible to a broader audience, including those who are deaf or hard of hearing. In noisy environments or places where viewers need silence, subtitles also allow viewers to follow the content without needing the volume turned up. You can even add some visual flare by personalizing your captions with different fonts and colors.
3. Correct Eye Contact
Eye contact is a powerful way to connect with your audience and makes them feel like you’re speaking directly to them. This connection is vital for keeping the audience interested and invested in your content.
Instead of re-recording videos when eye contact is off, save time by using Captions to correct eye contact in post-production.
4. Add AI Music
Leverage the power of sound in your storytelling with a little music. Add royalty-free music to your YouTube video to emphasize your video's key moments and themes. Select tags like genre, theme, and mood in the Captions app to guide the algorithm. Once you make your selection, Captions AI will arrange music to fit your video, automatically reducing the volume when it detects speech so your audience doesn’t miss a word.
Adding AI Music during editing helps set the mood and convey the desired emotions to your audience, making your YouTube video all the more memorable.
5. Turn Long YouTube Videos Into Shorts
Optimize your existing videos by turning them into YouTube Shorts and snappy promotional videos to market your channel on other platforms. Captions’ AI Shorts feature automatically identifies and edits viral-worthy clips from long-form YouTube footage and creates short-form content quickly.
You can post these shorter clips as YouTube Shorts or as TikTok videos and Instagram Reels to tease your videos, promote your channel, and encourage users on these platforms to check out and subscribe to your YouTube content.
FAQs About How to Edit Videos on YouTube
1. Is the YouTube Video Editor the Only Option to Edit Videos?
No, there are many video editors on the market. The most efficient options, like Captions, leverage the power of AI to provide cutting-edge features to edit videos quickly and easily.
Whether you're a pro at editing videos or creating your first one, you can use these AI-powered tools to enhance video quality, record with a green screen, and stabilize footage to improve your videos' overall visual and audio appeal.
2. What Size Are YouTube Videos?
On a computer, the standard aspect ratio is 16:9. This is a widescreen format. If your video's aspect ratio differs, the YouTube player will automatically change to the best size to fit the viewer's device.
For example, if you upload a video with a 4:3 aspect ratio (more square-like), YouTube will adjust the player size accordingly, adding black or white bars on the sides to maintain the correct aspect ratio. For videos with a different widescreen aspect ratio, the player will adjust to fit the video correctly without distorting it to ensure viewers can watch without experiencing stretching or cropping issues.
3. Can You Edit Videos on YouTube if They’re Already Published?
You can edit your previously published videos directly on YouTube using the native editor — YouTube Studio. Here’s how to do it:
- Go to YouTube Studio.
- Select “Content” in the left menu.
- Select “Videos” and click on the video you want to edit. A menu will appear above your videos.
- Click “Edit.”
- A list of edit options will appear. Click the drop-down arrow and select the edit you want to perform — change title, tags, visibility, and so on.
- Enter the changes and click the blue “Update Videos” button.
Edit Your YouTube Videos to Perfection With Captions
YouTube's native editor can perform basic edits, like trimming or cutting your videos. It can also add standard elements, like thumbnails and info cards. But a more comprehensive tool like Captions can help elevate your content and gain viewers' attention.
Whether you want to add custom captions, fine-tune your video quality, or make speech corrections, the Captions app offers many features to accelerate your editing process and level up your YouTube videos.


